

The Customization tab is your design studio for the EaseAccess accessibility button. Here, you can personalize every visual aspect of the button, from its icon and color to its precise location on the screen, ensuring it perfectly integrates with your website's branding. As you make changes, the Preview pane on the right will update in real-time.
Button Customization
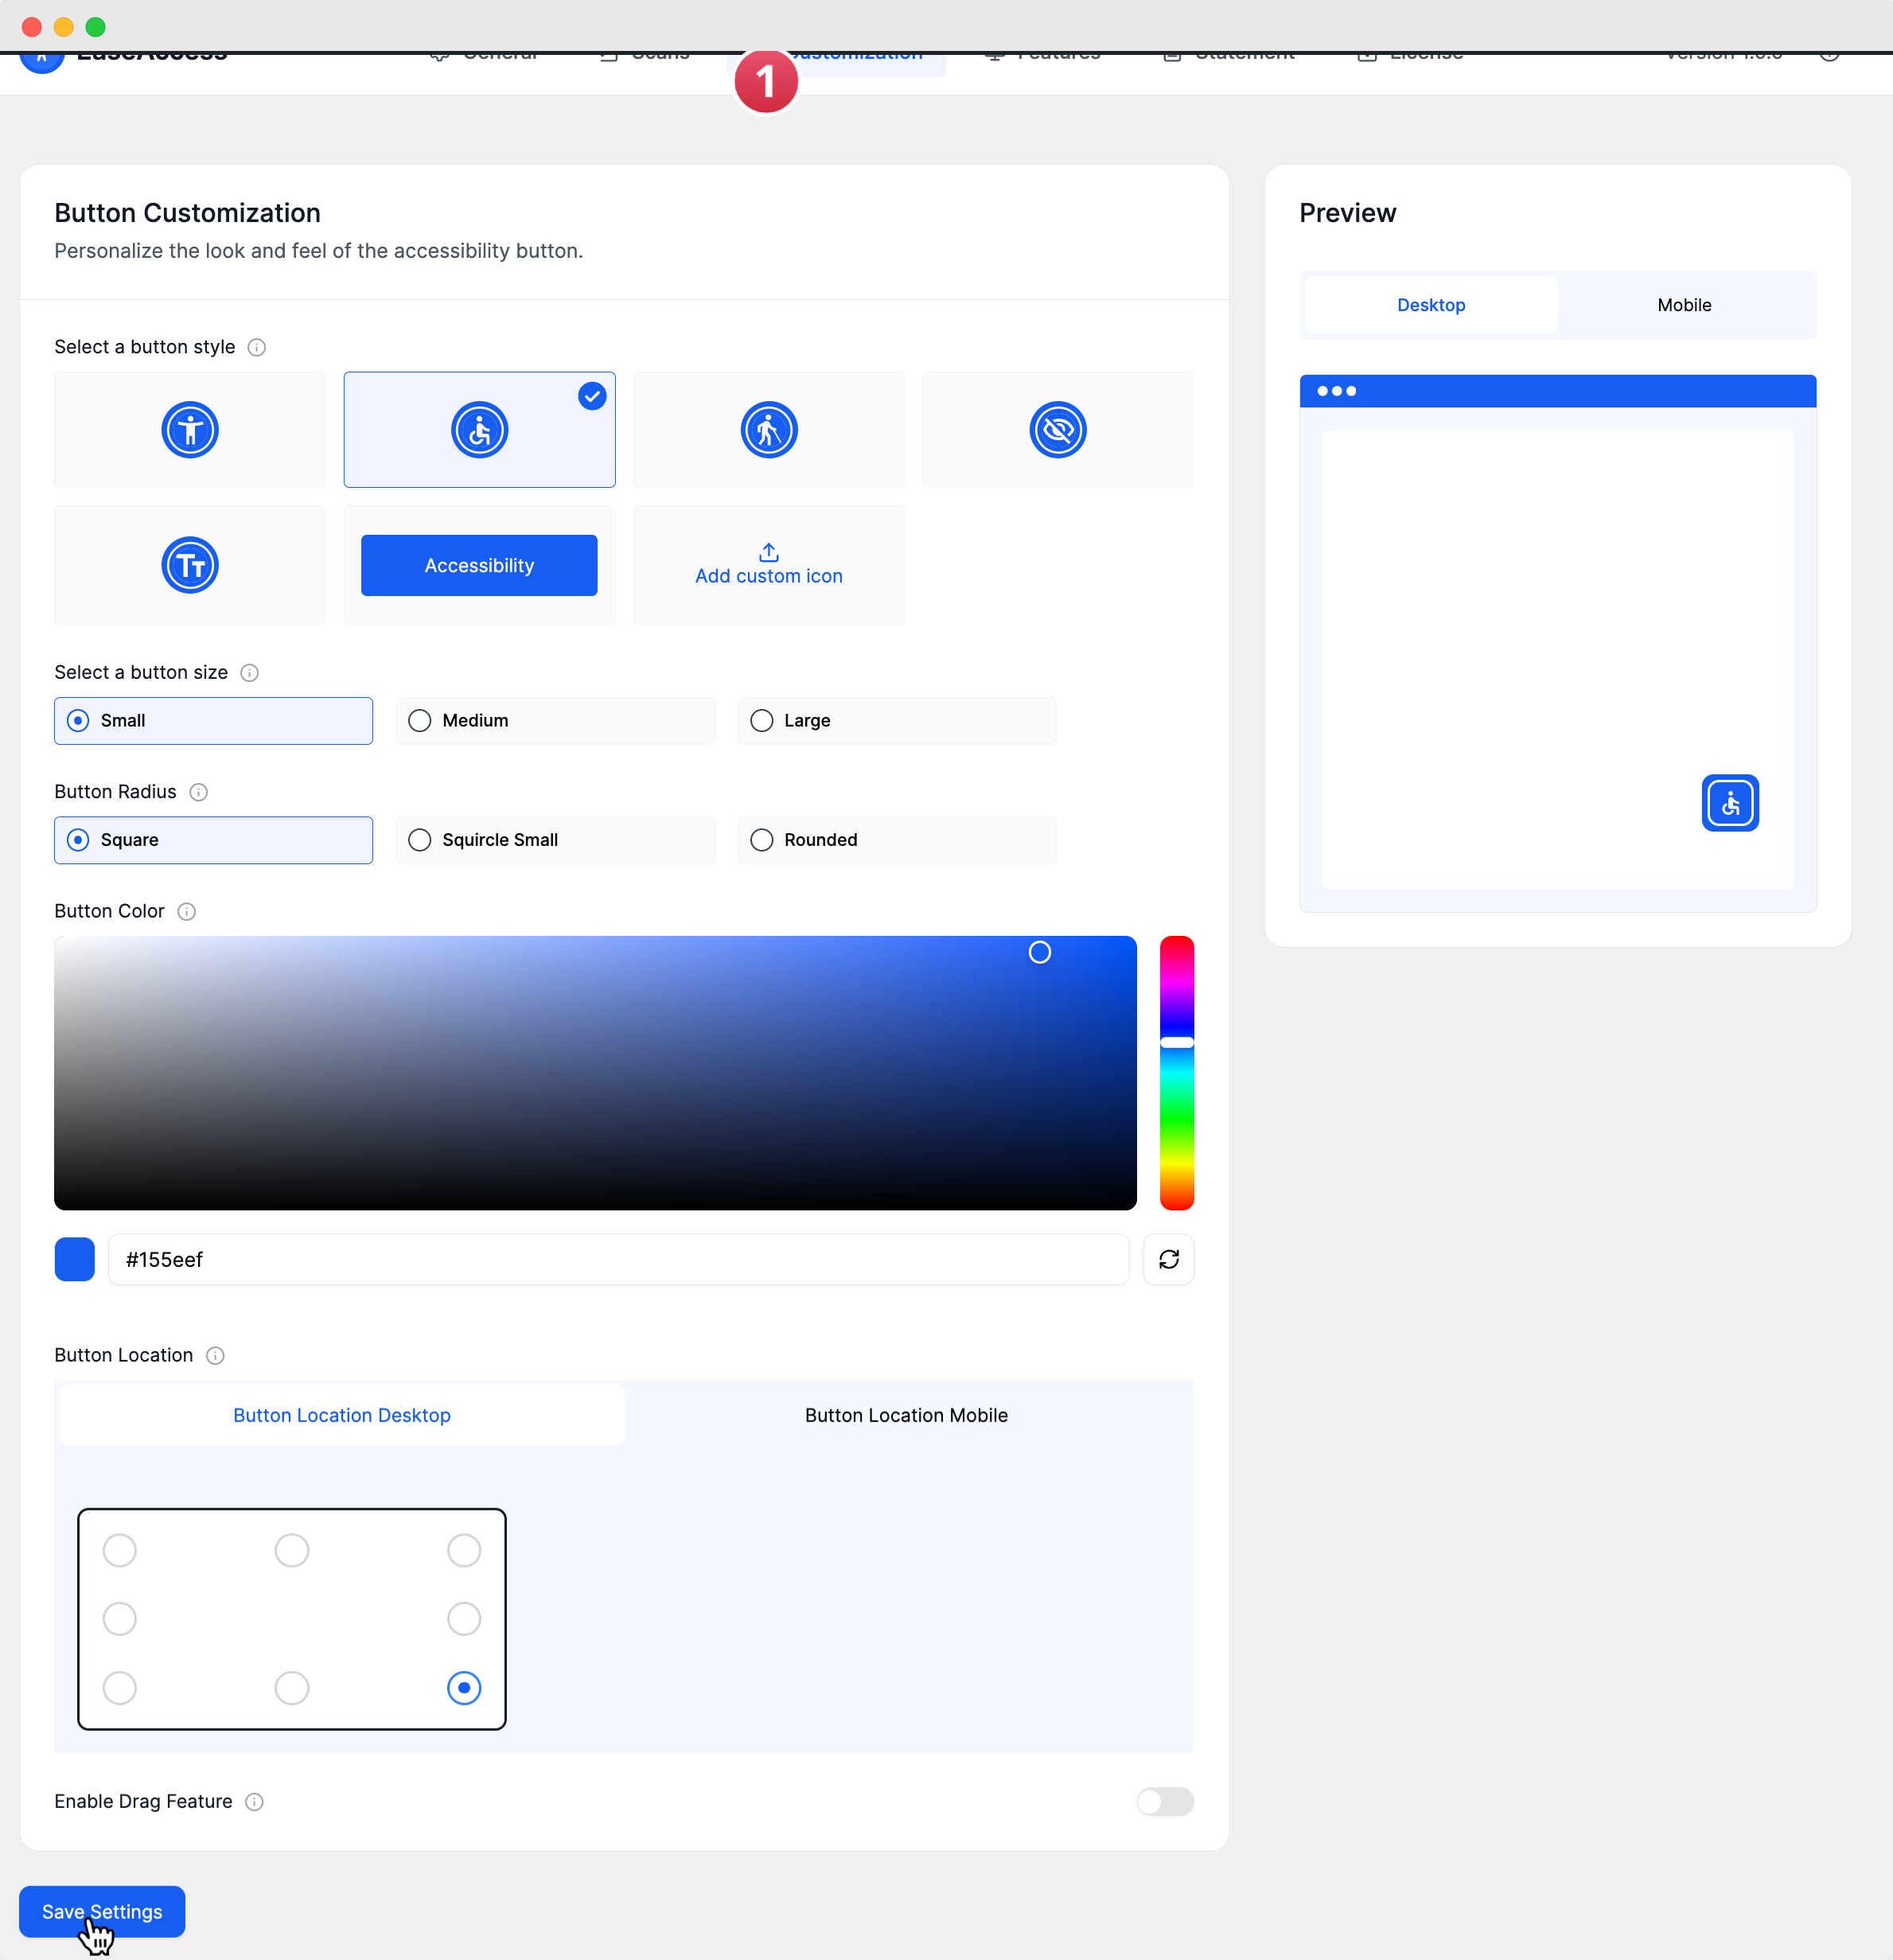
This section controls the look and feel of the button itself.
Select a button style: Choose the default appearance for your accessibility button. You can select from:
Several predefined accessibility icons.
A simple text-based button (Tt).
A button with the full word "Accessibility".
A custom design by clicking Add custom icon to upload your own image.Select a button size: Adjust the overall size of the button by choosing Small, Medium, or Large.Button Radius: Control the shape of the button's corners.
Square: Sharp, 90-degree corners.
Squircle Small: Gently rounded corners for a modern, soft look.Rounded: Fully rounded corners, which will make the button circular if its height and width are equal.Button Color: Use the interactive color picker to select the perfect background color for the button. You can also paste a specific HEX color code directly into the field.
Button Location
This section allows you to set the button's position on the screen, with separate controls for different devices.
Button Location Desktop / Button Location Mobile: Use these tabs to configure the button's placement independently for desktop and mobile users. This ensures an optimal, non-intrusive experience on any screen size.
Position Selector: Within each tab, you can select one of the eight predefined positions around the edges of the screen for quick and easy placement.
Interactive Features
Enable Drag Feature: Toggle this switch on to give your website visitors the ability to click and drag the accessibility button to a new position on their screen. This provides an extra layer of user control, allowing them to move the button if it covers an important page element.
After configuring these options, remember to click the Save Settings button to apply your changes to your live website.